Monday 30 January 2012

Buffet/sideboard Love!

Wow, what a few busy weeks I've had here. I wish I could post every single project, but I just don't seem to have the time :( I do have a lot of pics and a lot of stories..maybe I can save them for slower periods? I will try. 
For today I really want to share my sideboard. I found this on Kijiji (Canada's favorite buy and sell site) 

I have to tell you. Some sellers are just a bit on the strange side. The person I picked this up from had a line of people waiting to take this. She would not tell anyone that it was sold till someone came with the money. None of that SOLD PPU for her (sold pending pick up) 
When I got there she wanted me to pay for it, then to leave it there. Ummmm no. I will pay for it, and take it right away thanks :) 

So then it sat in my basement. I had some custom orders to finish and some emergency orders to get out of the way (for my booth) I wanted to really devote proper time and thinking into what I was going to do with it.

Well I finally got to it. BUT like always (almost always) I didn't take any before pics :(
BUT........ I did take some pics part way through the ummm fixing. 
 So it did need a little TLC. As you can see.
 When I went to lay it down to start working on it, two of the legs literally fell off! I'm not kidding. I'm surprised they stayed on for the ride home in the back of my truck!
 The two middle legs were wonky/ glued on so they were not exactly straight (understatement) So naturally I had to remove them. But that turned out to be a bit more than I expected. Seeing as the other two fell off, I thought this would be easy. As you can see, I ended up having to saw them off. Had to drill out the existing dowels and replace them. Glue them and put them back. MUCH stronger now! This baby won't ever come apart again!


Patience is not one of MY virtues...so waiting for everything to dry, just kills me! But I'm getting better at it. I find something else to do while waiting (normally at least over night) 
I tell you, all that effort was more than worth it. 
 I stained the top and painted then distressed the bottom (lightly distressed)
 I think it turned out beautifully! I'm really in love with bulky or unusual legs and this fits my passion so perfectly!
 This piece is so solid, I actually dropped it when I was finally ready to get it back up on it's wheels. Nothing moved :)
 Painted the inside a dove grey, the outside is a very very VERY light Robins egg green (gotta love oops paint)


 I was going to replace the hardware, but it's all original, so I cleaned it up and put it back. I seriously could not have gotten something that would have matched this better.


LOVE that it still had all it's original wheels. I can't tell you how many times I pick something up and the wheels have been removed or destroyed. So when I get something that has it all, I'm over the moon! 

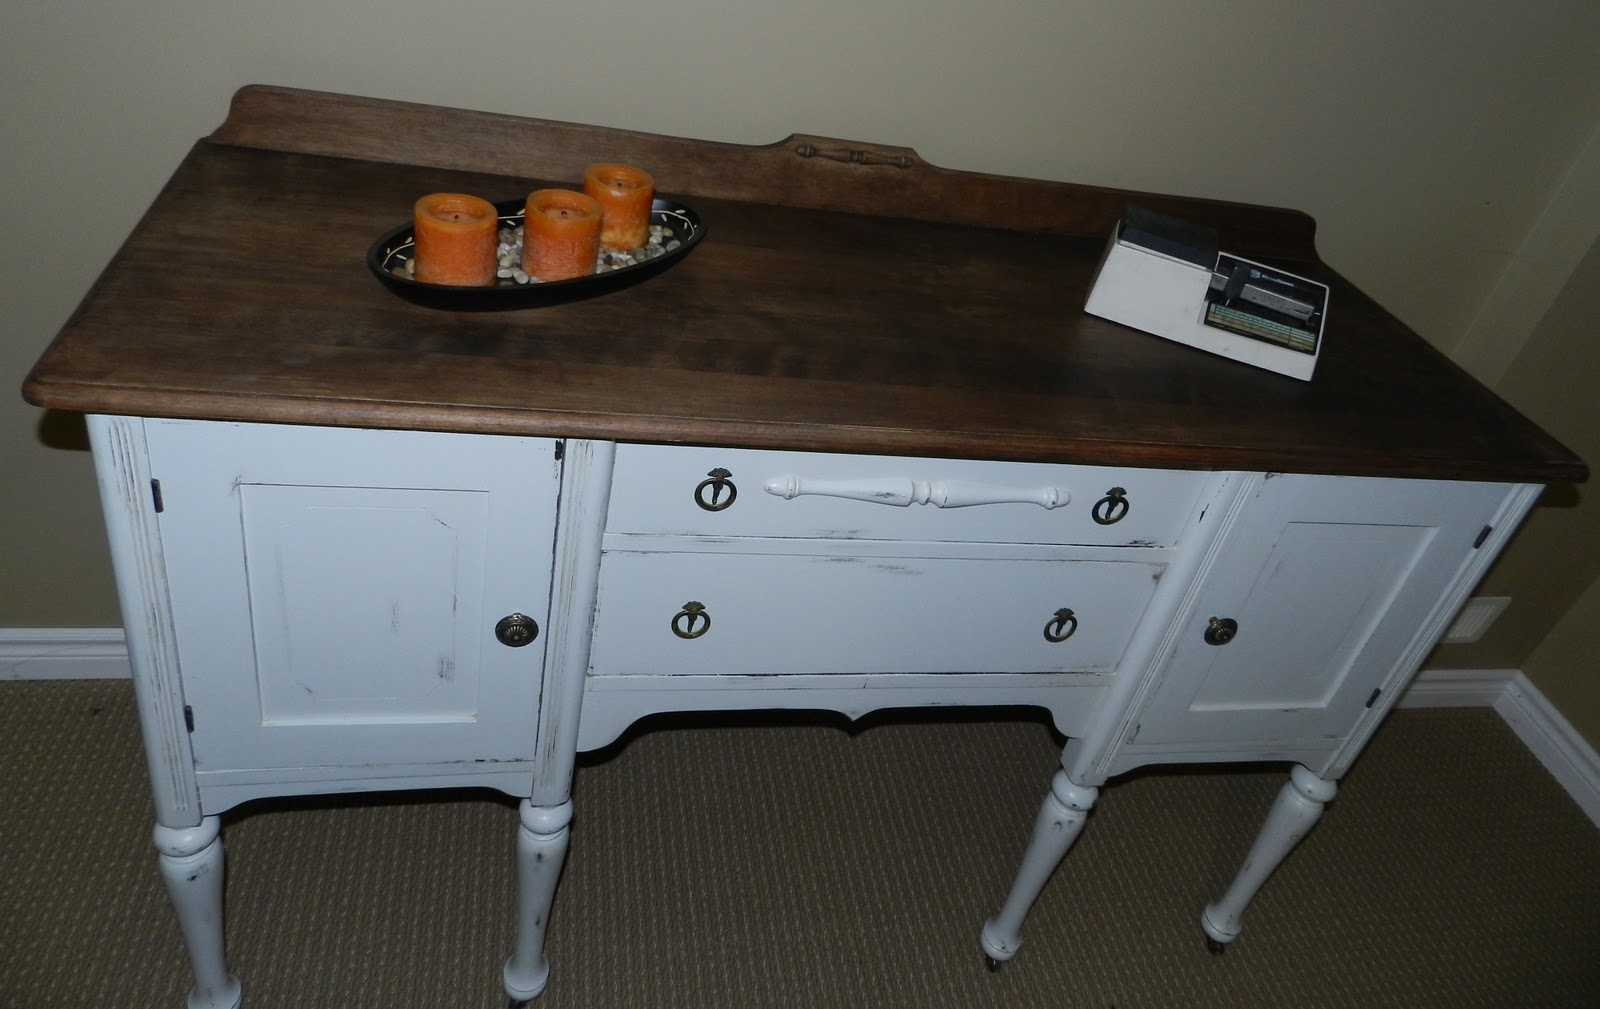
So tell me what you think. Comment below :) 

Linking up

Funky Junk Interiors

Classy Clutter  

The 36th AVE 

Serenity You 

Bacon time with the hungry 

French Country Cottage 
Our delightful Home 
Coastal Charm 
Not Just a Housewife 

Wednesday 11 January 2012

Ramblings.

I still consider myself very new to the blogging world. I would love to "link" up and do parties on here but I never seem to have the time to actually learn the art of blogging. I quickly write posts, do "my thing" and then leave. 
Mind you I never have a problem cruising other peoples blogs and drooling over some of the things I see. I've learned a LOT from other people. Not only how to do things, but also giving my creative juices a bit of a boost. Please bare with me as I continue to learn. Have a wonderful Wed everyone :) 

Monday 9 January 2012

Farmhouse dresser Completed!

Yesterday I shared with you some before pictures of my horrendous  Design challenged Farmhouse Buffet. Well I finally have it finished and Can't wait to share with you the "after" pictures. 
 After struggling to remove all that lovely linoleum from both the top of this beauty and the insides of the drawers..I decided it was just easier for the drawer bottoms to be replaced. So having the best husband in the world, I just handed that little project over to him and he had that done in no time :) 


 I then proceeded to strip away a TON of paint. There was that yellow and orange, then green and beige..several layers of white and finally a metallic Bronze.
Trust me when I say there were times during this process I seriously wanted to just paint it and get it out of the house. The paint was THAT hard to get off! But I wouldn't let my standards drop for this piece...after all I couldn't let one little buffet get the best of me. I'm stronger than that...cough cough. Ok, so maybe it was just my stubborn nature that made me finish this thing :) (not that I'm admitting to being stubborn). 


 So do you like? I LOVE this. It turned out better than the picture I had in my mind. And you just know my mind is a scary place at times ;) 
So remember this before pic? Or you can read the whole story HERE
Scary stuff!
 And the AFTER! 
I'm pleased. 
Thanks for stopping by, and feel free to comment, you know us bloggers just love all the feedback we can get :) 

I WAS FEATURED!!


Linking up : Craft-O-Maniac
                    Northern Cottage  
                    It's Party Time
                    Tales from Bloggeritville  
                    Sisters of the Wild West
                    Kammys Korner 

Sunday 8 January 2012

Sneak Peek. Farmhouse buffet!

Just putting the finishing touches on this wonderful piece of history. 
I picked this up MONTHS ago, but just never got around to redoing it. I have to admit, it was working wonderfully in my workshop to place items on and in while I was working on other pieces. But the other day, I thought to myself...I just need to get that done and out of here so I have more room in this place. Sooooo, I cleared it out and found another piece that will sadly be neglected for a bit to hold my "stuff". 
I will get the after pics for you tomorrow after I drop it off at my booth. (will take the pics before it goes)
This baby was BRUTAL! Most people would leave it, burn it..or just pretend they didn't see it. 
 See what I mean? BRUTAL

See the black spots on the doors? Those are cut out pieces of plastic and glued on.

 
Did you see the top? Let me get a better shot. 
Or maybe this shot? 
Have you figured it out yet? 
Yup..LINOLEUM!
Isn't that just so special. OY..who puts linoleum on furniture? Seriously? 
So that is your sneak peek, time to go add knobs and do my final sanding and take some more pics of another project I'm finally done. Stay tuned, tomorrow will be an exciting day :)

Monday 2 January 2012

Tiny dresser/chest


Sorry for the unclear title. I'm just not sure what this is. I found it online and thought it was just to cute to leave alone. So I did my little email and picked it up the next day.
It looks like a full sized dresser, but it isn't. It's only 12 inches tall and 18 inches wide. 
I'm horrible at taking before pics. So these are from after I remembered to grab my camera.


Although it had a few layers of paint, it did come off rather easily. (phew) While stripping the paint off I noticed a metal label attached to the back and the stripper I used removed the paint without damaging the label. So I was able to clearly see the "makers mark". This research queen found out (thanks to the wonderful little label) that this cute piece was made by returning injured vets after the first world war. 
I'm such a history buff, so every time I come across a bit of Canadian history I feel so blessed to be able to bring it back to something that can be used and looks so pretty for someone to place in their home. 
This little treasure was made somewhere between the end of the war and 1925, that is when the program ended. I pictured some person labouring over this piece with love and determination, trying to fit back into civilian life after giving their all across the ocean to defend our freedom. I almost wish I had found it before Remembrance day.
I stripped it, sanded it, stained it and it still didn't look right to me. 
Every have your projects talk to you? Mine do all the time. This one was begging to show it's age and look good at the same time. So I tried something new. After staining it, I ADDED paint in a way that I hope looks like I left it there in the first place. 
Let me know what you think. It's a first for me. 


 What do you think of the little splashes of colour? I absolutely love it! 
I was Featured at Momma Hens Coop! Go have a look and join the party! Thank you sooooo MUCH!!!


Momma Hens Coop


Linking up to these wonderful blogs :)
Domestically speaking 
The Thrifty Home 
DIY Show off 
We are That Family 
Southern Lovely 
Momma Hens Coop 
 Project Queen
Pandoras Craftbox
Stacey Emrbracing Change 
The Shabby Creek Cottage 
The Vintage Farmhouse 
Miss Mustard Seed 
A diamond in the Stuff