Wednesday 29 August 2012

Crazy people do crazy things

Some days you just have to shake your head and wonder "what were they thinking?"
I had one of those days this week. 
Check out this dresser. 

 Tongue and groove pine over a dresser. hmmmmm
 Rip away a piece to see what was under it. Gee that looks like solid wood with a great design under it.
More solid wood. Yippie!! Lets get to work! 

So I figured that whomever covered this baby up couldn't manage to get the paint off of it with the screwdriver they were using, gave up and covered it with pine. Simple fix to a solid piece. But ugly as sin. 
I removed all the pine (actually my husband did since he was having a blast ripping it off I let him go for it..lol)
It took a lot of work to get that paint off, I think it was some sort of magic paint that really didn't want to let go. Then a TON of sanding to get all those scratches out. Apparently screwdrivers leave deep gouges in wood. 
BUT it is solid maple (at least I think it is) 
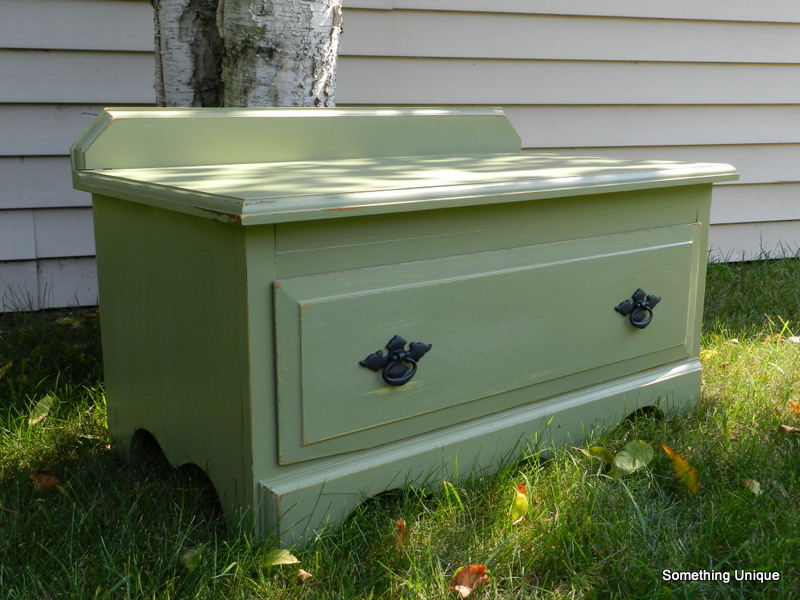
So after all that work..a coat of stain and a couple coats of varnish....we have......

 A very rustic and nice looking vintage piece.
 I was originally planning on painting the body of this boy...but decided to keep it Au-natural.

 You can see where I filled in the holes from the handles the other people added. But I think those spots just add a bit of a story to it.
I obviously removed the back top thingy, as that was pine and this isn't. 
So what do you think? Worth saving? 
I love it! 

And I want to share a site with you that I think is totally awesome, if you have a chance, go check it out. 
They have featured me twice now and I feel very lucky to be recognized there. 
Apartment Therapy 

Sharing here:
The Shabby Creek Cottage 
36th Avenue 
1929 Charmer 
Domestically Speaking 

Monday 27 August 2012

One lovely blog award

One Lovely Blog Award

I am beyond thrilled to say that I have been nominated for "One Lovely Blog Award" from  WOW! I'm touched! It's a fabulous blog and *bonus* she is a British Columbia girl, just like myself. Thank you, Kathryn!

The rules are simple:
  1. Thank your nominator
  2. Tell 7 things about yourself
  3. Nominate 15 other blogs
     I love it! It's like a blogger chain letter that you actually want to receive!
Now for 7 things about me.

1. I'm Canadian, but I wasn't born here, I was born on a boat in Holland.
2. I've lived in 4 countries. The Netherlands (aka Holland) Canada, USA, and Brazil
3. I've been married to my husband now for just over 8 years, second marriage for both of us, and definitely our last marriage! 
4. We have 4 adult children. One is getting married this Sat, so we will have our first Daughter in law..yippie! :)
5. Next week for the very first time my husband and I will be living alone together without children. YIKES!
6. I have changed careers a dozen times in my life. Sometime I will share with you everything I've done.
7. For the very first time in my life I have lived in one house for 5+ years. And I want to move, call me crazy...lol

Now for the blogs I'm nominating. Please take a moment and visit these wonderful blogs. I had a horrible time picking just 15. There are so many great blogs out there, and so many people who inspire me to keep moving and get that next piece finished. Thank you everyone out there in the blogging world. I love the connections and the friendships that have been and continue to be built!


1. Pickin and Paintin 
2. Art is Beauty
3. Knick of Time Interiors
4. New Again
5. Pretty in Paint
6. Oakview Cottage
7. Restore and Renew
8. Antique Recreation
9. Rustic Urban
10. Simply Vintagous
11. Shabby Gals
12. The Golden Sycamore
13. The Ivy Cottage
14. The Shabby Porch
15. Twice Nice

Sunday 26 August 2012

From Junk to FaB

I really believe that most things can be saved. OR recreated. 
But you need to have a vision. Sometimes it take a bit of time to see beyond what is presented to you and think outside the box. 
A few weeks ago I did a table for the neighbours and wouldn't take anything for doing it. So they gave me a couple of old pieces they thought I might do something with. Be prepared. The before pictures are brutal. 

 This top one had a drawer that was just falling apart. It did have the door fronts, but I didn't like the look of it all. Stickers and scratches all over the piece. But it was solid. My husband (who really has become my partner in crime) and I talked it over and decided to do something completely different with it.
This one was missing the top drawer completely! and the bottom drawer had huge gouges out of it. You can't see it very clearly in this pic but it was also split and just not fixable. But again...we decided to go in a completely different direction. 

We worked hard, and I'm sorry I don't have any in between pics. The Top picture was an entertainment unit. We cut off both the top and the bottom of it and redesigned it to this.

 Wouldn't this look perfect in your mud room? Entrance? kids room for holding extra toys?

 I added a splash of blue inside the drawers :)
 I'm 5'6" and it is the perfect height for me to sit on.
The handles were replaced and the whole thing was very slightly distressed and sealed to last :) 

The second piece was given a similar make over. 
Again, cut down, and shorter than the first one. 

 Isn't she sweet?
 I love how the handles just set her off.


Some light distressing and a good seal..and she is ready for her new home! 
Sharing here:
My 1929 Charmer 
I should be mopping the Floor 
Primitive and Proper 
The Ivy Cottage 
Salt Tree 
Faded Charm 
Savvy Southern Style 
36th Avenue 
Domestically Speaking 

Thursday 23 August 2012

I love the Re Store

People are constantly asking me where I pick up the pieces I find.
Mostly I think I'm very lucky.
I don't have "one" spot that has everything. As you can see from my past posts I do find some things on the side of the road. Other times I get lucky at yard sales, or auction sales or estate sales. Sometimes people give me things they just want "out of my house".
There are times I stop in at one of the local Re Stores. That was the case with this girl.
 See I really am bad at taking before pictures.
As you can clearly see I as working on taking the veneer off the top of it.
There was some major damage to the veneer and it really did need to come off.
 For those of you who don't know how to do this. It's time consuming, and a lot of patience is needed but the actually process is rather simple.
 A hot iron (don't use the same one you use with your laundry please) a wet towel, a lot of patience, a hammer and a scraper. Wet the towel, place hot iron on it and let it warm up the glue used to glue the whole thing down...then peel off. Some are easier to remove than others. And please don't gouge the wood.

This one came up rather easily. But the wood was very soft in some spots :( So some of the wood came up with the veneer. I was soooo upset :(
I normally fix minor imperfections, but this one has a major hole that no matter what I did, couldn't be fixed.
So the top had to be painted.
Please forgive the lousy pics. It was night time and I just couldn't wait to snap them. 
 It had some great details that really do pop (more than the pictures show)

 See all those lovely lines? And these knobs were actually planned for another project but I thought they belonged on this one. I don't mind switching things up at the last moment :)
 I always love both legs and great details that just add all that character that we crave in older things :)

 Great knobs :)
One of these days I'm going to come across one that I know will be a forever piece for just me...but till then, I am just trying to bring together lost pieces and the people they belong to :)

Wednesday 22 August 2012

A real Fixer upper!

A few days ago I shared my found walnut dresser. You can read about it HERE
I mentioned that I had picked up two dressers. 
I want to share with you the process of fixing something that maybe could have been left there...but what would it be to leave something there that can be fixed? After all it's what we who love old furniture do right? 

Actually the drawers on this one were HUGE and in GREAT shape. So that really wasn't the issue. 
So this is the before pic...it's on it's side and those are my husbands legs. We got to work on it before I pulled out my camera. What can I say, I get excited about working on stuff I seldom remember to get really good before shots in :) 

While he was measuring I got to work on the drawers. 

This was after I added some wonderful stripper. I find that when working with something this old, it's actually safer to use a chemical stripper than to try to sand it off. Although I was planning on painting it, I always remove the old paint. 
And since this was OLD...I knew there had to be lead paint in there. Better to catch it all in the stripper than to let it linger in the air. 
While that was setting, I went to snap a couple of pics of the wonderful job my husband was doing. 
 See how rotten the legs were? This involved a lot of measuring, cutting, measuring, deciding what stays and what goes..how much can be saved etc.
Then gluing, and cutting some more. Trust me this was quite the process because you have to stop and re evaluate at the completion of each step. And there are no set rules or patterns and a lot of it is just learning as you go. Each piece is different. 
This one wasn't as hard as some we have done, but I wanted you to get a feel for what we do. It isn't all just strip, sand, paint, wax/seal. 
 I was finally able to get down to the wood. I actually loved the wood and seriously considered just staining it and leaving it really rustic looking.

I actually did stain it with a "gunshot" stain I have and still really loved it. 
But I didn't keep it. It wasn't going to look right once I stripped the rest of the piece.

 Again, this is still sitting on the side, but I wanted you to see what a really OLD piece looks like. I am figuring this one came from the early 1800;s. That is hand cut wide tongue and groove Ash. Then when checking to see if the locks worked, I discovered that the locks were also very early 1800's. So this baby is roughly 200 years old!
 See how my hubby replaced just enough to keep the integrity of this dresser?...ok, it's not original, but it works and trust me it looks great now! 
I did strip it down..the grooves on the front were the worst to get clean, but it was soooo worth the effort. 
 I really had to work hard to get the top looking like new again! But it was worth it.
 There was one of the wood key holes missing, and the others were in bad shape, so I replaced them all.
 The handles were not original, so I replaced them with these glass ones that say Onward, kitchener in them.

 Look at how wonderful that Ash turned out! Yes it looks like Oak, but isn't. They used to call Ash, the "poor mans oak"
 Like I mentioned earlier, the drawers were in great shape and actually really clean.
So what do you think? Was it worth saving? 


Sharing here: